
I Stopped Buying Bread After Making These! Easy No-Knead Bread Rolls
Freshly baked bread rolls are one of life’s simple pleasures. The smell of warm bread filling your kitchen, the golden crispy crust, and the soft, fluffy center make every bite worth the effort.
If you’ve been buying bread rolls from the store every week, this easy no-knead recipe might completely change your routine.
With no stand mixer, no bread machine, and no complicated techniques, anyone can make bakery-style bread rolls at home. Simply mix the dough, let time do the work, shape the rolls, and bake until beautifully golden.
These homemade rolls are perfect for breakfast, sandwiches, burgers, soups, or simply enjoyed warm with butter.
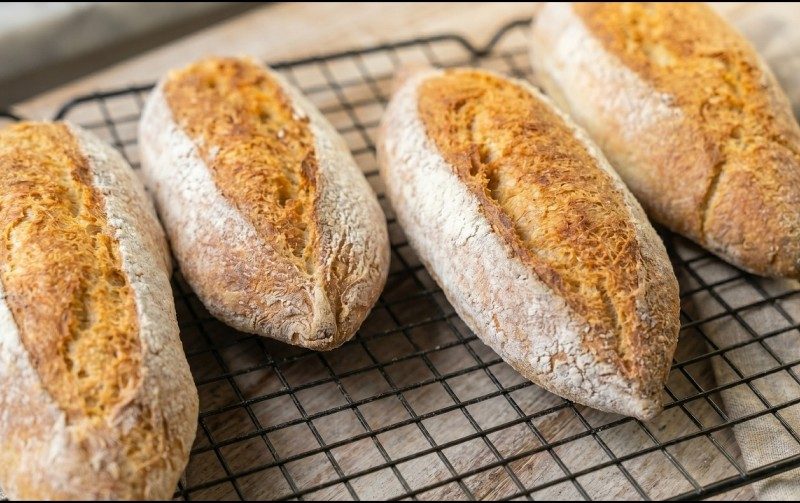
I Stopped Buying Bread After Making These! Easy No-Knead Bread Rolls
Cuisine: bakingDifficulty: Easy4
servings25
minutes1
hour20
minutes700
kcalIngredients
400g (3⅓ cups) bread flour
400g (3⅓ cups) bread flour
2 teaspoons instant dry yeast
1 teaspoon salt
Directions
- In a large mixing bowl, combine the bread flour, instant dry yeast, and salt.
- In a large mixing bowl, combine the bread flour, instant dry yeast, and salt.
- Pour in the water and mix until a sticky dough forms. There is no need to knead the dough.
- Remove the dough from the refrigerator and let it sit at room temperature for about 30 minutes.
- Remove the dough from the refrigerator and let it sit at room temperature for about 30 minutes.
- Divide the dough into 8 equal portions and gently shape each piece into a smooth ball.
- Place the rolls on a parchment-lined baking tray, leaving space between each roll.
- Cover loosely and let the rolls rise for about 45–60 minutes, or until noticeably puffy.
- Preheat the oven to 210°C (410°F). Place a heatproof bowl filled with hot water on the bottom rack of the oven to create steam for a crispier crust.
- Bake the rolls for 25–30 minutes, or until they are deep golden brown.
- Bake the rolls for 25–30 minutes, or until they are deep golden brown.
Notes
- – The dough should remain sticky. Avoid adding extra flour.
– Overnight refrigeration improves both flavor and texture.
– Bread flour produces the softest interior and the best rise.
– Steam inside the oven creates a crisp, bakery-style crust.
– Store leftovers in an airtight container for up to 3 days or freeze for up to 3 months.
Why You’ll Love These Bread Rolls
There are plenty of bread recipes online, but this one is designed to be as simple as possible while still producing incredible results.
You’ll love this recipe because:
- No kneading required
- No special equipment needed
- Crispy golden crust
- Soft and fluffy inside
- Perfect for beginners
- Great for meal prep
- Freezer-friendly
- Made with simple pantry ingredients
Once you’ve made them, you’ll understand why homemade bread tastes so much better than store-bought rolls.
What Makes These Bread Rolls So Soft?
Instead of kneading for 10 or 15 minutes, this recipe relies on time to develop gluten naturally.
After mixing, the dough rests in the refrigerator where slow fermentation improves both texture and flavor. A few gentle folds strengthen the dough while keeping it light and airy.
The result is bread rolls with a soft interior, an open crumb, and a chewy texture that’s perfect for everyday use.
The Secret to a Crispy Crust
One simple trick makes these rolls taste like they came from a bakery.
Place a heatproof bowl filled with hot water on the bottom rack of your oven while the bread bakes.
The steam helps the rolls expand before the crust sets, creating a beautiful golden finish with a crisp exterior.
This easy technique gives your homemade bread:
- Better oven spring
- Crispier crust
- Rich golden color
- Bakery-style texture
Perfect Ways to Serve These Bread Rolls
These homemade rolls are incredibly versatile and pair well with almost any meal.
Enjoy them with:
- Butter and jam
- Homemade burgers
- Chicken sandwiches
- Breakfast eggs
- Garlic butter
- Soup or stew
- Pasta dishes
- BBQ meals
- Mini sliders
- Cheese platters
They’re also delicious toasted the next morning.
Can You Freeze Homemade Bread Rolls?
Yes. These bread rolls freeze exceptionally well, making them ideal for meal prep.
Allow the rolls to cool completely before placing them in a freezer-safe bag or airtight container.
They’ll stay fresh for up to three months.
Whenever you need fresh bread, simply thaw them at room temperature or warm them in the oven for a few minutes until soft inside and crispy outside.
Tips for the Best Bread Rolls
A few small details can make a big difference.
- Use bread flour whenever possible.
- Measure ingredients accurately.
- Keep the dough slightly sticky.
- Don’t rush the rising time.
- Handle the dough gently.
- Bake until deep golden brown.
- Cool on a wire rack before storing.
These simple tips help create bakery-quality bread every time.
Frequently Asked Questions
Can I make these without a stand mixer?
Yes. Everything is mixed by hand using one bowl.
Why is the dough sticky?
A sticky dough creates softer, lighter bread. Avoid adding too much extra flour.
Can I use all-purpose flour?
Yes. Bread flour gives the best texture, but all-purpose flour also works.
Why didn’t my rolls rise?
This is usually caused by inactive yeast, a cold environment, or not allowing enough fermentation time.
How do I keep the crust crispy?
Bake with steam and cool the rolls on a wire rack before storing.
Final Thoughts
Making homemade bread rolls is much easier than most people think. With a handful of everyday ingredients and a simple no-knead method, you can bake soft, fluffy rolls with a beautifully crisp crust right in your own kitchen.
They’re perfect for breakfast, lunch, dinner, or freezing for later, making them a recipe you’ll come back to again and again.
Once you’ve tasted these freshly baked bread rolls, you may never want to buy store-bought bread again.